Before departing for warmer shores, we had spent a great deal of time sailing in and around the UK. This led us to believe that we knew everything there is to know about sailing. Nothing could be further from the truth, we almost needed to learn again as we went along (not navigation and radio/emergency equipment of course but many other things). We had to reconsider many things including our anchor and chain, the liferaft we would use and many other items. In this section you will see the items we started with and what we ended up with and why.
We give the name of the product above each of our comment boxes. If the color of the name is RED it means it did not live up to expectations. The color orange means it was OK but not what we needed. If the name is in green, then the item was good and generally did what it said on the packet.
WATERMAKERS
THE WATERLOG
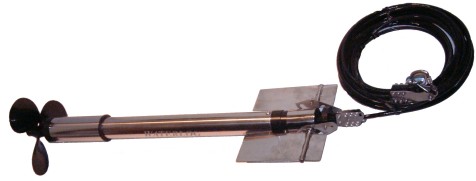
Carrying out a number of investigations, we came across a 'towed watermaker' called the Waterlog. We were looking to reduce our dependency on electricity in whatever way we could and felt that a towed watermaker would be the ideal solution. As you will see from the above picture, the device consists of a stainless steel metal tube, inside which is a very fine membrane that filters sea water. The propellor is activated by speed through the water which generates the high pressure needed to filter the sea water. Once filtered, the impure particals are flushed back into the sea whilst the clean water is then passed up the very fine tube (using Capillary action) and thereafter would drip feed our fresh water tank. A brilliant idea. So we purchased this item.
Unfortunately, even though we were sent a replacement at one time, neither of these units EVER produced a single drop of fresh water, regardless of our speed through the water.
In their defence, the Waterlog was advertised as producing just drops of water and therefore taking a long time to produce anything really meaningful. However, because it was supposed to produce all the time it was being towed behind a yacht, we had felt that this would be a really good solution. You will understand therefore our dissapointment at eventually having to send the unit back to the manufacturers. I have to say that the company never argued or told us we were doing things wrongly, they just re-imbursed us the full cost.
THE DESSALATOR D60 FREEDOM
Looking around for another watermaker, we decided that we would have to use electricity and so we came across (at a boat show) the Dessalator
Following an extended discussion with the company on their stand, we purchased the Dessalator D60 from Advance Yacht Systems, a UK company, and they turned out to be an excellent company with first class after sales service. The watermaker itself is of French manufacture. This watermaker is capable of producing up to 60 ltrs per hour (depending upon the salinity of the sea water; we generally found we could produce between 45 ltrs and 50 Ltrs per hour with no problem). We were in Spain when we ordered the Desalator and it was delivered with no problems. As we were so far away from the UK, we decided to install the unit ourselves (with guidance from the great staff at Advance Yacht Systems. When I had questions, I would ring them and they would immediately ring me back and stay on the line until I was able to understand. This watermaker turned out to be a first class device and we would recommend anyone to speak with Advance Yacht Systems if they are thinking of installing a watermaker.
Luckily, I also had Doreen to help and as she was able to actually get into our lower lockers she held the long filters in place whilst I bolted them to the shelf above.
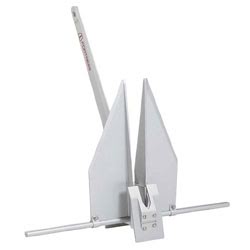
ANCHORS AND CHAIN
CQR AND 8MM
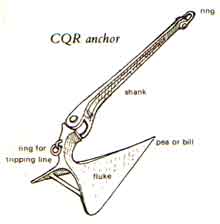
When they had prepared hull 82 for the London Boat Show, the brokerage had installed a number of items (to make her look good for the show). This included a CQR anchor together with some 80mtrs of 8mm chain. We though this was wonderful as we had used CQRs around the UK and they generally worked well.
Unfortunately, we did not realise that the original anchor and chain would be far to light for anchoring Kiah in many different kinds of sea bed and weather conditions. So with the help of Jan & Max (Mambo), whilst we kept the original anchor and chain, we decided to add a new ground tackle setup and decided on the Spade and 10mm chain, see below.
SPADE AND 10MM
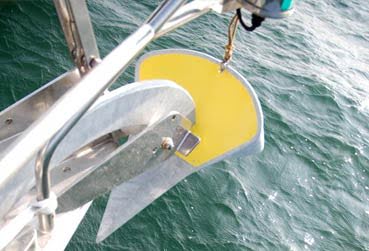
This anchor, together with the heavier weight of 10mm chain proved to be an excellent choice. We had to check with the windless people to see if our unit was sufficiently robust to be able to handle the quite substantial extra weight, luckily they said yes.
The Spade anchor with 10mm chain never failed us, in the Med, or the Atlantic, Caribbean, Bahamas and the USA. We did drag on two ocassions, within an hour of deploying the spade, but I believe this was due to the fact that I had not been able to dig in the anchor correctly, so we had to move to find a better spot for anchoring which we did and thereafter no futher problems were encountered. A first class anchor.
FORTRESS FX23
After some time sailing in the Med, we determined that it was essential for us to have a good KEDGE anchor. The main purpose of the Kedge was to help us keep the nose of Kiah into the wind and waves when anchored in bays, and to help us keep Kiah off wooden and stone pontoon berths if we were alongside in strong winds and seas.
The Fortress FX23 proved to be an excellent piece of our ground tackle. We positioned a bucket on Kiah's transome, that housed some 10 mtrs of 8mm chain attached to 30mtrs of rope, the end of which was attached to a 'stainless steel bobbin' that we purchased in Turkey. This ground configuration is easy to deploy and recover and, the holding power is exceptional in either the normal ground position or the mud position. First class anchor.
LIFERAFTS
OCEAN SAFETY 6 MAN CANISTER

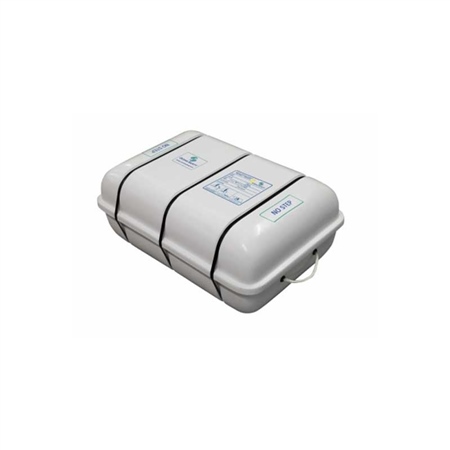
Deciding upon lifesaving equipment is not as easy as it sounds. Our first thought was that we must have a liferaft that would comfortably house at least 6 people. As time went on we realised that it is as bad to have too big a liferaft as to have one that is too small. The canister liferaft we chose weighed in at 50kilos and did not (it turned out) have the raft within a waterproof bag inside the canister. It had to be serviced annually and on one ocassion when the canister was opened there was a great deal of water inside and a fair amount of rust floating. So we determined after a while to look again at how best to handle the life raft situation. This canister liferaft turned out to be so heavy that it would certainly take two people to easily remove it from the deck stainless cradle and launch it over the side. It also turned out that we felt it was necessary to NEVER have more than 4 people on board (otherwise even Kiah would start to feel crowded. So we determined after a while to replace the canister with a 4 man valise.
SEGO 4 MAN VALAISE
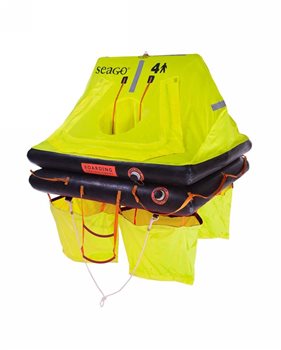
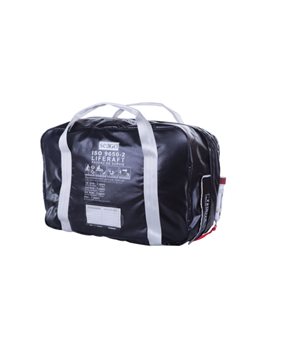
We decided on a 4 man valaise, and made sure that the raft and auxiliary items were all sealed in a plastic bag inside the valaise
Though we never had to use this liferaft, it being lighter and sealed made it the right choice. Also the fact that it had a 4 year service period made a great difference.
WINDVANES
HYDROVANE
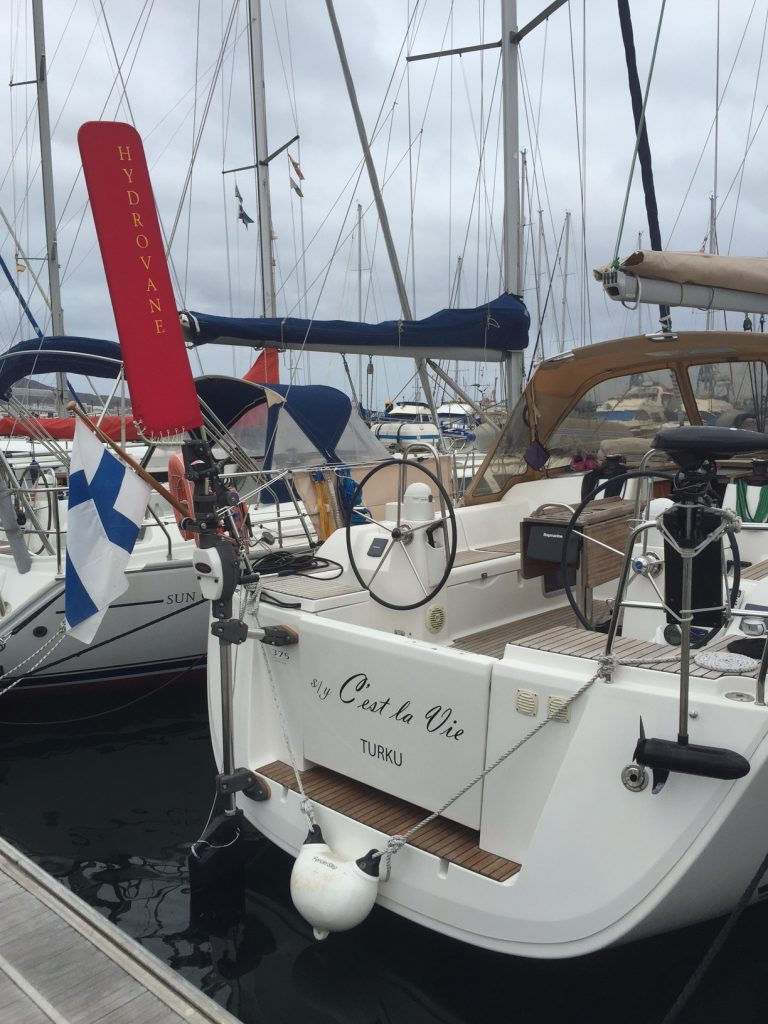
Firstly I must say that, though we looked at the Hydrovane, we did not speak with the sales people of any company selling this windvane.
We also have nothing bad to say about this windvane. Many yachtsmen and women we know have them installed and are perfectly happy with them. We did not choose this make of windvane because we had seen and were captivated by the SERVO PENDULUM style of MONITOR.
MONITOR
.jpg)
The MONITOR fitted all of the criteria we had set ourselves regarding the installation and use of a windvane for Kiah.
It took me many years (believe it or not) to get to know how to properly use the Monitor Wind Vane. As Doreen continuously told me, I should read the instruction and owners manual. Eventually, I realised that the manufacturers were absolutely right and that regardless of how I tried, UNLESS I had the sail plan right, I would never get the Monitor to work properly. I managed it by putting a permanent first reef in the mainsail and WOW it worked. Thereafter we used the Monitor in light airs as well as storms and it did the job perfectly.
During our Atlantic crossings (E to W and W to E) we used the Monitor extensively it proved to be a great asset, especially when, on the return journey, it was just Doreen and I crewing Kiah.
The only thing we might do differently, were we to do this again, is to install the Swing Gate version of the Monitor which allows the unit to be swung aside so that the transome may still be used as a swim platform.
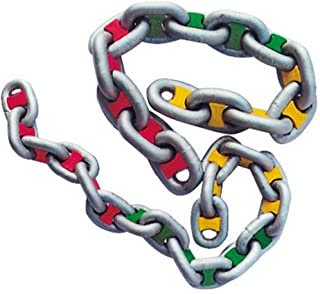
CHAIN MARKING
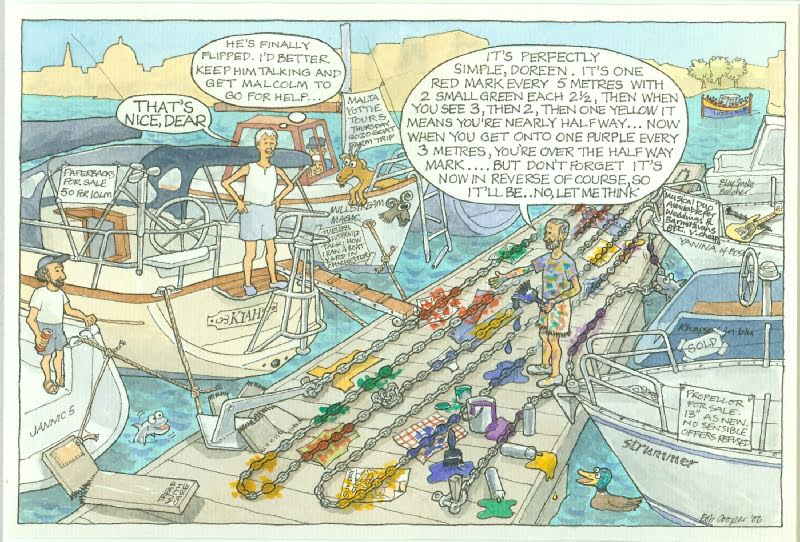
The thumbnail picture to the left, was commissioned by Doreen for my 60th birthday when we were berthed in Msida Creek marina, Malta.
Bob and Liz on their yacht Yanina of Bosham, are excellent musicians but also Bob is also a first class cartoonist.
Bob agreed to carry out the commission and gave the matter some thought before coming up with several ideas of cartoons that would fit the bill as a birthday present. Doreen chose the 'Chain Marking' and Bob set to work. If you click on the thumbnail you will be rewarded by a larger 'lightbox' image
The cartoon is funny but behind it is a very serious issue. I did take all of the chain out onto the jetty, in Malta, to re-mark the chain by painting the necessary depths on it. I did also use old T shirts and towels to put under the areas to be painted (Doreen helped too by supplying me with some old towels). So remember it is fun but also a task that has to be carried out once a season or once every two seasons.
There are many ways of marking the anchor chain in order to monitor the amount of cable that has been deployed.
BUT (and it is a large BUT). It is not easy finding a method that gives the characteristics of being a. able to be kept firmly in place and b. is bright and clear and easy to read.
To be clear about this, in order to know how much chain or rope you have deployed, it needs to be possible to read the 'meters' or 'feet' or 'fathoms' that are passing out through the bow rollers at fairly high speed, in daylight or at night, in order to be sure you have sufficient out to cater for the depth of the sea to the bed and to allow additional to ensure the snubbing does not pull the anchor out of the sea bed.
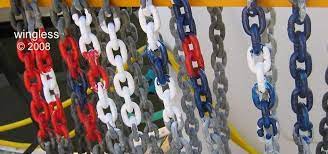
PAINTING THE CHAIN
USING CABLE TIES
USING PRE MADE PLASTIC CHAIN MARKERS
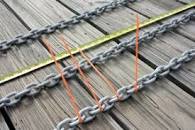
USING SAILMAKERS TWINE
This method is the same as using Cable Ties but with the advantage of the tails being much more flexible and therefore less prone to snapping off. For this method I decided on every 10 meters and, at the first 10 I put one tie of sailmakers twine around the chain link and left a long tail. At the second 10 meter mark I put two ties of sailmakers twine with two long tails, and so on, until I reached the 50 meter mark on the chain. From the center of the chain I then reduced the ties every 10 meters. Marking a chain to the half way point and then reversing the process back down the other half means that it is possible to turn the chain (which is always needed at some point) without having to re-do the chain marking
The 'fors' are that it is cheap and easy to do. It leaves a very flexible tail attached as part of the knot around the chain link, therefore it is not prone to breaking when the chain is turning around the windless. The 'againsts' are that in time the twine becomes dirty and so it is not easy to see the markings as the chain is being deployed.